Sunday, February 24, 2008

Bananas are for monkeys


Okay, as you see here the door belt line seems to line up on the body pretty well on the car when I first bought it. One small problem though, the door was actually just the outer skin welded into the body, so in fact the B pillar was no where in the neighborhood of being located correctly. The key is to stabilize the front cowl section as a starting point and proceed to the rear of the car. However, my car is going to be channeled, so the original feet on the cowl have to be moved up 3 inches.


So the only thing to to is just dive in! I recreated the cowl feet, so that they lined up with the subrails that are sitting on the frame. When this starting point was established, I bolted some brackets to the bottom of the B pillar, and ran a come-a-long from B pillar to B pillar. When pulled tight I welded a piece of angle as a temporary tie in supprt. What this created was the ability to pull the quarter panels up against the subrails, and tilt the B pillar forward and backward to line up the belt line.


You can also see how I welded the quater panels into the B pillar to create the solid new rear quarters. The doors were now put on the hinges and closed for the first time. Talk about a "barn door" kind of fit! AGHHH! I had done another '34 back in the early 1990's and really could never overcome this problem on the car. I had to cheat at the end and actually cut the sub rails in front of the B pillar and create a step down towards the front of the car. This lifted the door up, but it still was never right. See photo below:

My mistake was to weld the B pillar to the subrail too early, and therefore "paint myself in a corner" with nowhere to go.


Now with the door in, and the cowl bolted down, it was just a matter of pushing the tail of the car down, and lifting the bottom of the door up. With a little pushing and pulling I was able to get a perfect fit. Once the fit was established, I tack welded the rear inner fender panels to the subrails, welded backets to the B pillars and welded them to the sub rails, and waalaa! Perfect alignment - sort of... After several trys I realized that you have to overshoot the target some, as the body weight is applied, the door wants to sag. But that is the thing about building cars out of junk. You have to be willing to do and re-do and re-do again until its right. Sometimes it will stress the patience and ego, but in the end you have a really nice car.


Wednesday, February 20, 2008

Sheet metal repair continues


Even though I had been fortunate enough to locate not two but three coupe doors and an original cowl , they still needed to be reworked. I took the doors to Unpaint in Atlanta, to have the dipped in a caustic tank to kill all the rust. When they came back the bottoms were gone and nothing but clean 80 year old metal was left.


The door bottoms and cowl had bad rust out, so reconstruction was in order. Patch panels can be welded in a number of ways, including gas welding, tig welding, and mig welding. Gas welding is by far the best and most difficult, as you only weld one inch and a time, and then hammer the welds out to actually "re-forge" the steel. This means that the metal is heated, welded together with little to no filler rod, and hammered flat, essentially creating a new seamless piece of steel. Donnie Smart uses this method, and creates joints that require little to no bondo to make them perfect. My preference is to mig the panels together, with no overlap, and hammer and grind the joints. It does a reasonable job, and is relatively fast to put together. The panels require more filler to paint, but since I build cars just for myself, I am okay with that. Here are some examples of the work I did on the doors and cowl:

You can see the cowl patch here as well as the door patch.


Here is the reproduction interior door patch installed.

The next issue was the subrails. The subrails are located at the bottom of the door opening and are seen in the photo above. They are the basic support for the body that runs from one end of the body shell to the other, and sits on the frame much like a shoe box cover sits on the shoe box. I use the reproduction subrails, and I actually modified them slightly by welding one on top of the other (actually using 2 sets) and in effect channeling the car. The cowl section was then grafted in as you see below to give a more or less stock appearance, albiet a somewhat taller sill. The frame is being used as a jig here to serve as the foundation for the body.


No you may recall from my previous posts that channeling a car makes it sit lower without actually modifying the suspension. The look I was shooting for was a raked look, so it would give an aggressive "race car" persona.


So at this point I have the quarter panels welded in, along with the inner wheel wells and the rear tail section somewhat assembled. The next step is to gather this "banana peel" up and make the door line fit up. Now that sounds routine, but it is incredible difficult to make rusted bent, twisted, torqued, abused, welded, patched, cussed, bled on metal fit together as a new factory steel car would in 1934. First off, how do you determine what the "factory new" specifications actually are? Then its just a matter of getting from point A to B. LOL!


More on that drama on the next post.....


Wednesday, February 6, 2008

Construction Continues 1934 ford 5W

THE BATTLE CONTINUES!!


Work continues on the rear clip of the coupe body:


After both sides had been welded in the next step was to integrate this rear body clip in with the lower deck lid panel and rear part of the roof section. The lower decklid panel was actually in very good condition. The interior part had portions missing, but was not all that hard to replicate these missing part and weld them in.

I use a mig welder for all assembly, and butt weld the joints together in most cases. I will hammer form these seams on flat panels to keep distortion to a minimum when grinding the weld flat. Its important to constantly "step back" and view your project from a distance as your eye will catch many imperfections and disproportions before your tape measure will. Making the seams through the belt line rib allows you to hide the weld and minimize distortion as the curve will hold its shape better than a a flat panel will and you can smooth it over with filler when the car is painted. Next was to address the rear window panel that had been rudely cut out with a torch. Again my friend Donnie Smart had a rear window section out of a coupe. I learned that the coupe and sedan are different, in that the sedan had a curved bottom edge and the coupe is straight. It came with the prerequisit bullet hole, which I debated on leaving it in the body, but finally decided to weld it closed.


The upper deck lid panel was a mess and I should have had Donnie make another one for me, but I patched what I had together and went from there. The trunk hinge pads were missing, and had to be fabricated, which took a week to get worked out. The problem is to place them correctly so the trunk lid will close where its supposed to. I had bought a new decklid from Steve's Auto Restorations and had some decklid hinges. Its all trial and error to get the thing to fit correctly and hours of patient manipulation.


The next major project was to get a foundation that the body could be secured to and built up from. I bought a pair of new reproduction frame rails and the Chassis Engineering X member and took the diamensionals from a frame drawing and proceeded to build my frame. The frame rails were secured to metal saw horses that I built. Center was established from a wire strung from one horse to another, and used as a center reference I began to position the rails and cross members.


This photo is a later one, as I didn't take any as I began to postion the frame rails on the saw horses. With the frame assembled, the next step was to cut the body loose from the existing twisted frame (it had been welded to the frame) and position it on the new rails. Since I was starting with a car with no floor at all I decided to channel the car about 3 inches in the front and 2 inches in the back, just enough to cover the frame rails. Channeling is the process where the body actually sits lower on the frame, simular to a shoe box cover, and gives the car a lower look without altering the suspension.


Here you see two cars in comparison, with the one on the left being severely channeled and the one on the right in the factory position. I wanted my car to be low, but not as much as the blue car; just enough to hide the frame and with a slight rake. This is accomplished by taking the new sub rails that I puchased and welding one on top of the other. This gives a factory look with all the bumps and ridges that should be there, but sits much lower than normal. Below you can see the installed subrails that sit on the frame.


It was now time to take my new cowl and integrate it into the roof section and to the subrails. This was very time consuming as the metal was rusty, and rusty metal desintigrates instead of welds. You can see from the photo above where I welded new cowl bottoms and welded small patches in to make the section strong. The most difficult part of the project is getting the doors to fit in the body correctly and line up. When the floor is out of the body the body wants to sit and open up like a banana peel. The task is to gather it up again and place it in the factory postion. More on that process next post.

Tuesday, February 5, 2008

1934 Ford 5 window coupe project begins

THE PROJECT STARTS JULY 7, 2003
There it sat, after years of racing history behind it it was all but forgotten and left to rot in the woods for 30 years behind Jimmy Deason's house in Greenwood South Carolina. The car was raced here in Newberry, as well as Greenwood back in the early 1960s by Horace Kirkland, and then was sold to Jimmy to add to his collection. It was painted pink and had holes cut throughout the quarter panels. The rear window had been tourched out and the doors were welded in place. It apparently was wrecked towards the end of its career and had the frame badly twisted. The auction was in full process but no one was interested in bidding against me, so I claimed this jewel for $150.00 What a prize! Now all it was going to take was to drag it home and make a hot rod out of it.


But where do you start? What needs to be done first? As with any project its really just a series of small projects done one after another. If you look at it in that way, it keeps you focused and help prevent the feeling of being overwhelmed with the project. First thing I did was to take inventory of what I had, and what I needed. The frame was garbage, as where the doors and decklid. The tops of the quarter panels was usable, and the roof could be salvaged.


The rear window had been cut out with a torch, so another rear window section would need to be found. The front cowl was badly butchered, so another one of those would have to be located.


Looked daunting, but I did find a guy in florida that not only had a cowl section but three coupe doors, with one drive side and two passenger sides. I bought the doors and cowl for $800. along with some front end parts so I was starting to make real progress. As far as the quarter panels, I had my good friend Donnie Smart, who is an excellent metal man actually hand roll a left and right quarter panel. The quarters also included the inner fender panels, and was easily welded into the body section by cutting the belt line in the center and welding in the panels


HOT ROD PASSION


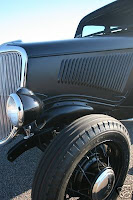
What can be cooler than a 1934 Ford coupe set up as a channelled hiboy? Maybe a flathead powered 1934 Ford pick-up set as a rat rod company car. My purpose for this blog is to share in the construction of these two hotrods, and share my thoughts as to the process and its purpose. I look at hot rod building as an artistic expression in steel. The challenge is to take what was considered a throw away car, and transform it into a rolling exquisit piece of art.